G-Spot Bass
Click on images to view hi-res photos.
![]()
The body is a single, solid piece of quilted maple. At about $1,000 cost from my supplier, this outstanding specimen was not cheap.

After the body is cut out and routed, I planed a gentle arch radius on the top.

The neck blank is quartersawn rock maple. I've installed a two-way truss rod and also 2 carbon fibre rods for added stiffness. The peghead design is finalized on paper and the fingerboard is select ebony.

Here the fingerboard has been glued to the maple neck. I've made a template for the peghead and the neck is now ready to be shaped to profile.

The initial layout for the mother-of-pearl inlay.

I'm cutting the "G" and the "picses" position marker symbols from gold mother-of-pearl using a jewellers saw.

Filing each shell piece to it's final shape.

Make no mistake....everyone makes mistakes!
I used black epoxy to glue in the inlay pieces. I broke one of the pieces at the delicate center stem as I was pushing it into place. After the epoxy was semi cured, I dug the broken piece out, cleaned up the cavity and cut a new piece. I'm showing this in order to illustrate that it's how you deal with a mistake that's important. Conceivably, I might have let this go and in the end you would have only seen a fine hairline crack in the pearl. But,I don't think I could have slept at night!

The fingerboard surface is detailed and polished, ready for jumbo frets.

Drawknife, spokeshave and microplane are used to shape the neck shaft. The transitions from shaft to peghead and shaft to heel are carved at this time as well.

After assembly of the instrument, I now spend time on meticulous sanding and preperation for finishing. The entire bass (except for the fingerboard) has been stained black directly on the wood. When you do this there is no turning back if you change your mind and want a different colour. But staining the wood directly gives that 3-D "WOW" factor as opposed to adding transparent colour in the clear topcoats of finish. Here the bass is shown in the paint booth after being stained and then receiving the first coat of clear finish.

Sanding in between finish coats. The goal is to achive a flawless surface.

Buffing the finish to mirror-like perfection.
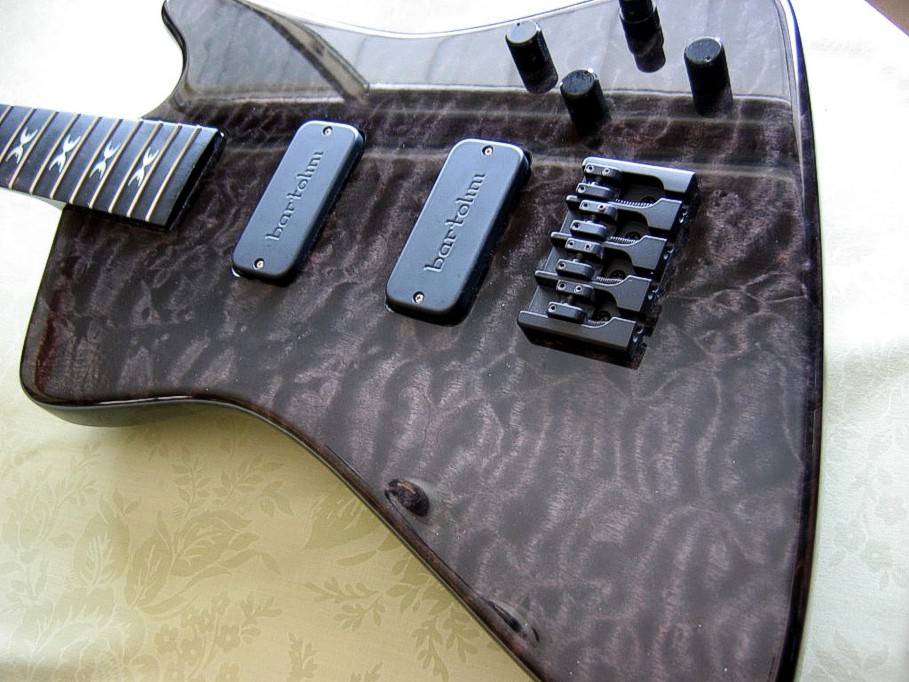
The hardware and electronics are installed. Now the bass gets a precision set-up.

A view of the back just before installing the control cover plate.
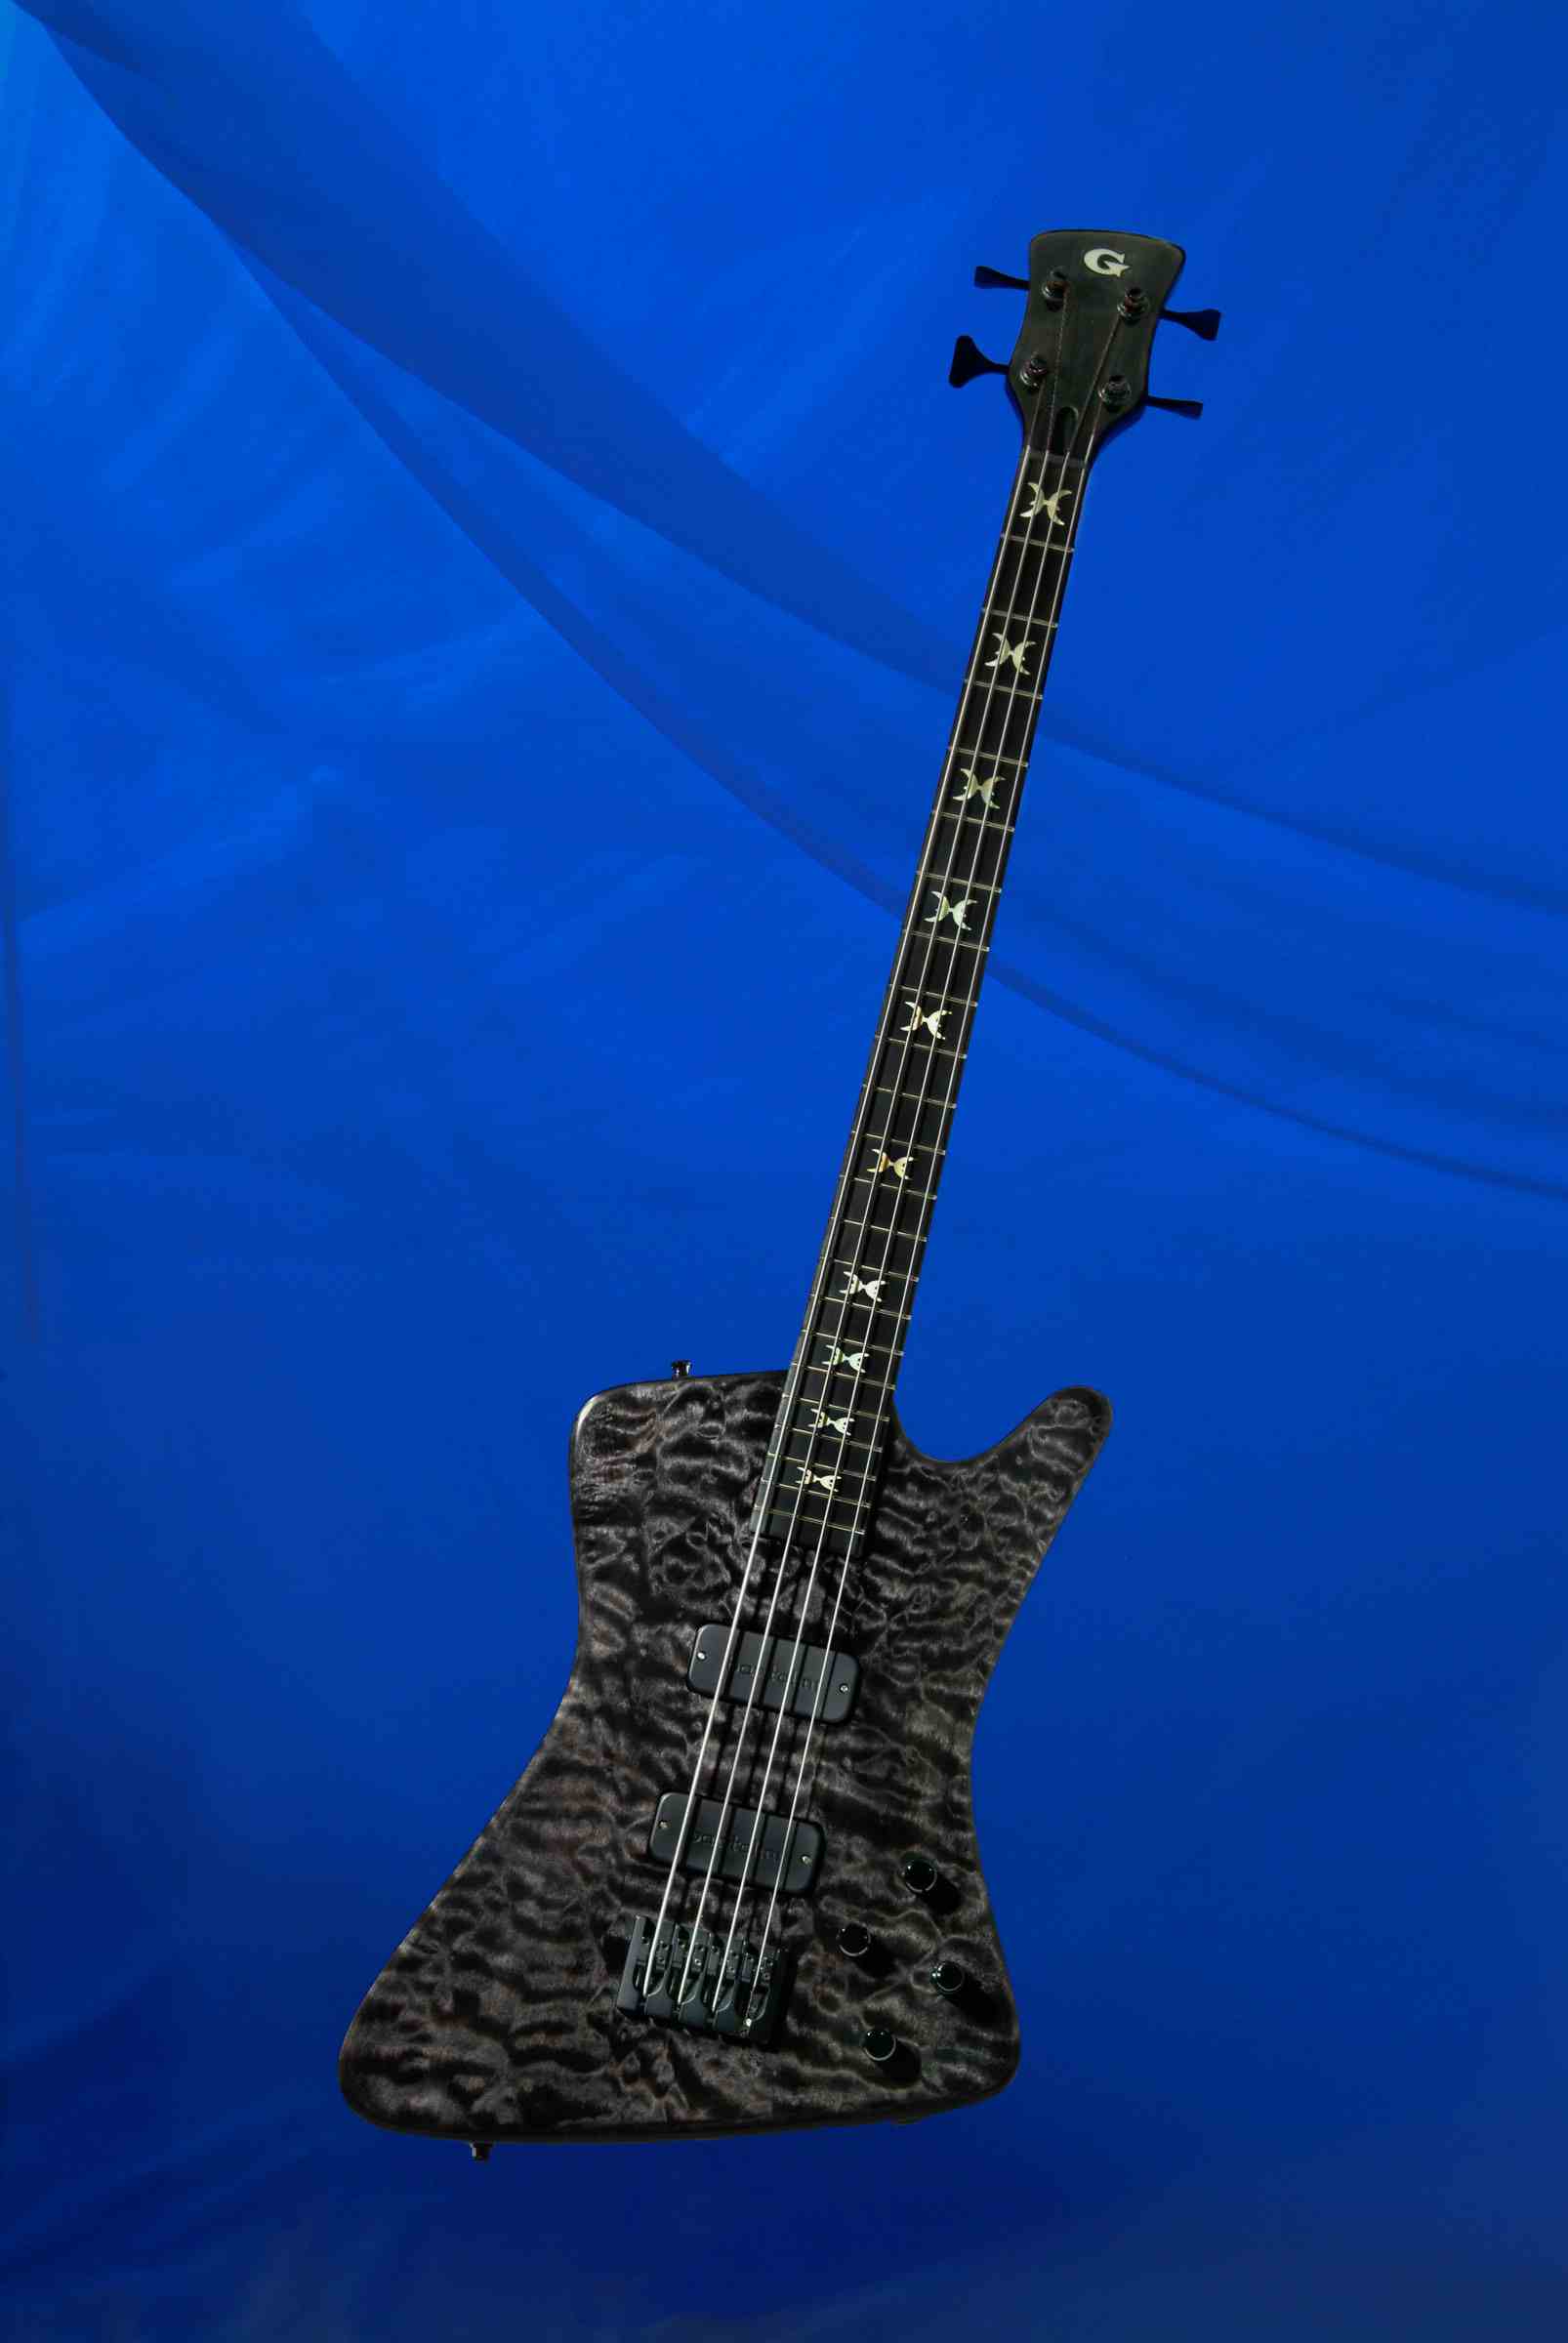
The finished instrument.
![]()